
Assuming you don’t have a roadside assistance plan, you’ll need to be prepared to fix a flat tire on your own. At a minimum, you’ll need the following:
-A functioning bike pump
-An extra inner tube that fits your tires
-A tire lever (or two)
-Patch kit and/or rubber cement (optional)
Of course, it’s also helpful to know how to actually fix a flat tire. There are plenty of tutorials online or in biking magazines that can walk you through the process step by step.
There’s nothing worse than being out on a ride and getting a flat tire. But if you’re prepared, it doesn’t have to ruin your day. Here’s what you need to fix a flat on the road:
– A spare tube that fits your tires
– A tire lever (or two)
– A hand pump or CO2 cartridge
With these things, you can change a flat in no time. Just follow these steps:
1. Use the tire lever to pry off the damaged tire.
If it’s difficult to get started, insert the lever under the rim and use it as leverage to pry the tire off.
2. Take out the damaged tube and inspect it for any punctures or holes. If there are none, try inflating it and see if it holds air.
If not, you’ll need a new tube. 3 Insert the new tube into the tire, making sure that it lines up with all of the valve stem holes. 4 Inflate the new tube using your hand pump or CO2 cartridge until it’s just slightly inflated – enough so that it will hold its shape but not be too tight in the tire.
How To Fix A Flat Tyre – Fix A Road Bike Puncture
How Do You Fix a Flat Bike Tire on the Road?
Assuming you don’t have a spare tire and need to fix the tire you’re riding on, here’s how to do it:
1. Take your bike off the road and find a level spot to work on it. It’s best to avoid areas with lots of traffic or sand.
2. Remove the wheel from the bike frame. To do this, first remove any quick release levers or bolts that are holding the wheel in place. If your bike has bolt-on wheels, you will need a wrench to loosen the bolts before you can remove the wheel.
3. Once the wheel is removed, flip it over so that you can access the flat tire. Use a tire lever (a tool made specifically for this purpose) or a blunt object like a butter knife to pry the edge of the tire away from the rim. Work your way around the circumference of the tire until it is completely detached from the rim.
4. Take out the inner tube and inspect it for holes or punctures. If there are no obvious leaks, inflate the tube slightly and listen for escaping air – this will help you locate small punctures. Once you’ve found the leak, mark it with a pen or pencil so you can easily find it again later.
5 .If The Hole Is Small Enough You Can Just Patch It With A Tire Boot Or Piece Of Old Inner Tube taped over The Hole On The Outside Of The Tire . If The Hole Is Large You Will Need To Replace The Inner Tube Entirely Get Your New Tube And Match Up The Valve Stem With The Hole In Your Rim There Are Two Types Of Valves Presta And Schrader Most Road Bikes Have Presta Valves Which Are Narrower And Have A Removable Cap That Needs To Be Removed Before Inflating Some Tubes Come Pre-Inflated So Be Careful Not To Over Inflate Slowly Insert One End Of The Valve Into The Rim hole Making Sure It’s Seated Properly Then Push The Other End Until It Pops Into Place Inside The Tire .
What Tools Do You Need to Fix a Flat Tire on a Bike?
Assuming you don’t have a fancy new bike with tubeless tires, fixing a flat on a bicycle is actually pretty straightforward. All you really need is:
-A tire lever (or two, or three).
These are long, thin pieces of plastic or metal that help you pry the tire off the rim. You can usually get a set of three for around $10.
-A patch kit.
This usually comes with a small piece of sandpaper to rough up the inside of the tire so the patch will stick, as well as several adhesive patches.
-A pump. If you don’t already have one, get a hand pump or an electric one that plugs into your wall outlet.
Make sure it’s compatible with both Schrader and Presta valves – most are, but double check before you buy!
Once you have those items, here’s how to fix a flat:
1) Use your tire levers to pry off the damaged tire from the rim.
You’ll likely need to use all three levers – start by inserting them under the lip of the tire and then using leverage to pull up on the handlebars until the bead of the tire pops over it. Once one side is off, go ahead and remove the tube completely.
2) Inspect both sides of your tube – if you see any punctures, use your sandpaper to roughen up an area around it about 2 inches in diameter.
This will help create a better surface for your patch to adhere to later on. If there aren’t any punctures visible, feel free to skip this step!
3) Find out where exactly your tube was punctured by inflating it slightly and holding it up to your ear – listen for escaping air.
Once you’ve found the hole, deflate your tube again and apply glue evenly around it (if directed by your patch kit instructions). Allow plenty of time for drying – at least 5 minutes should do it.
4) Place your adhesive patch over top ofthe dried glue/hole area and press down firmly all around its edges so there’s good contact between patch and tube material all around .5 inches from hole site . Again, allow drying time according topatch kit instructions before proceeding – this step is crucial!
What Do You Need to Patch Bike Tires?
When you get a flat tire on your bike, the first thing you need to do is figure out what caused the puncture. Once you’ve located the source of the problem, you can then proceed to patching the tire. Here’s what you’ll need:
-A tube of Vulcanizing Cement
-A Patch Kit (which will come with patches and sandpaper)
-A Pump
-Rags or a Clean Cloth
First, remove the wheel from your bike and deflate the tire completely. Next, use the sandpaper to rough up the area around the hole in order to give the cement something to grip onto.
Apply a generous amount of cement to both the patch and hole, then press the patch firmly into place and hold it there for about 30 seconds. Finally, re-inflate your tire and reattach it to your bike.
With just these few supplies, you should be able to easily fix a flat tire so that you can get back on the road!
How Do You Use a Puncture Repair Kit on a Road Bike?
If you’re out on a ride and get a flat, you’ll need to know how to use a puncture repair kit to fix it. Here’s a step-by-step guide:
1. Remove the wheel from your bike.
This will vary depending on whether you have a quick release or not. If you’re not sure how to do this, consult your bike’s manual.
2. Once the wheel is off, remove the tire.
You’ll need to deflate it first by releasing all the air. Then, use a tire lever (or two) to pry the tire off the rim. Be careful not to damage the tube in the process.
3. Find the hole in the tube and mark it with a pen or pencil so you can find it easily later on. Then, use a razor blade or scissors to make an X over the hole (this will help prevent further flats in that spot).
4 .
Now it’s time to patch the tube. There are two types of patches – cold patches and hot patches. Cold patches are easier to use but don’t always hold as well as hot patches; hot patches require more work but create a stronger seal.
Whichever type you’re using, follow the instructions on the package for best results. Apply glue around patch area if needed then place patch over hole and press down firmly for 30 seconds then allow full drying time before reassembling 5 minutes should suffice . For extra protection, apply another layer of glue over top of patch once dry otherwise just reassemble reinflate remount good as new!
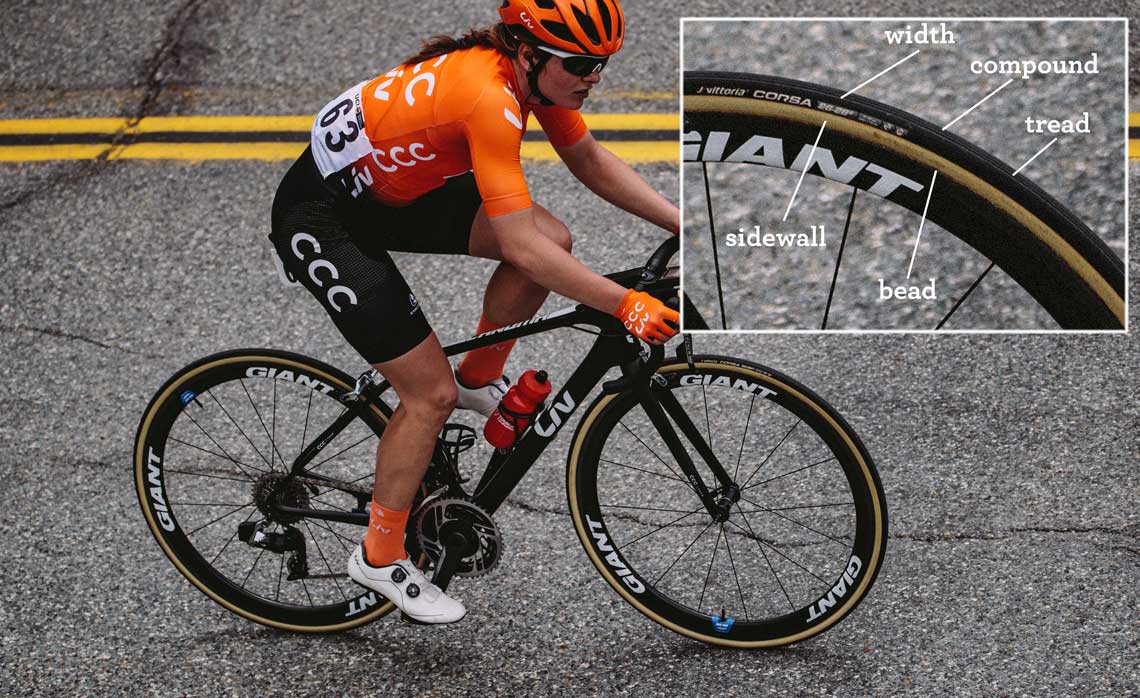
Credit: www.liv-cycling.com
Under Seat Bike Repair Kit
We all know that feeling when we get a flat tire on our bike. It’s never fun, but it happens to the best of us. That’s why it’s always a good idea to have a bike repair kit with you, just in case.
And what better place to keep your kit than under your seat? That way, you’ll always have it with you when you need it.
So, what should you include in your under seat bike repair kit?
Here are a few essentials:
– A pump: You’ll need this to inflate your tires after you’ve patched them up.
– Patch kits: These will come in handy for fixing any flats that occur.
– A multitool: This is perfect for making any adjustments or repairs that might be needed on the go.
– Tire levers: These will make changing a flat tire much easier.
– A water bottle: You’ll appreciate having this once you start pedaling again!
Best Bicycle Tire Repair Kit
There are many bicycle tire repair kits on the market, but how do you know which one is the best? Here are a few things to consider when choosing a bicycle tire repair kit:
1. Ease of use: You don’t want to be stranded on the side of the road with a flat tire and a complicated repair kit.
Look for a kit that is easy to use and comes with clear instructions.
2. Comprehensive: A good bicycle tire repair kit will include everything you need to fix most common types of flats, including patch kits, CO2 cartridges, and levers.
3. Quality: When it comes to something as important as your safety on the road, you don’t want to skimp on quality.
Look for a well-made kit from a reputable brand.
4. Price: Bicycle tire repair kits can range in price from around $30 to $100. Decide how much you’re willing to spend based on your needs and budget.
Best Portable Bike Repair Kit
A portable bike repair kit is an essential item for any cyclist, whether you’re a casual rider or a hardcore enthusiast. A good quality kit will contain everything you need to fix a flat tire or make other basic repairs on the go. Here are some things to look for when choosing a kit:
-A multi-tool: This is the most important item in your kit and will come in handy for a variety of tasks, from tightening bolts to adjusting derailleurs. Choose one that has a good selection of Allen keys and screwdrivers, as well as pliers and cutters.
-Tire levers: These are used to remove the tire from the rim so you can patch a hole or replace a flat inner tube.
Look for strong levers that won’t bend or break when prying off stubborn tires.
-Patch kit: A must-have for fixing flats, a patch kit includes adhesive patches and sandpaper for roughing up the surface of the tube before applying the patch. Make sure your kit has enough patches for multiple repairs.
-Pump: A good quality hand pump or mini air compressor is essential for inflating tires after repairs are made. Choose one that is easy to use and compact enough to fit in your saddlebag or pack.
Bike Repair Kit With Pump
It’s always a good idea to carry a bike repair kit with you when you go on a ride. You never know when you might need to fix a flat tire or make other adjustments to your bike. A good repair kit should include a mini pump, tire levers, and all the tools you need to make basic repairs.
A mini pump is essential for inflating your tires after fixing a flat. Make sure to get one that is compatible with your valves ( Presta or Schrader). Tire levers are also key for changing out a flat tire.
You’ll need at least two, and maybe three depending on the width of your tires. Lastly, don’t forget the actual tools! A set of allen keys is necessary for most bikes these days, as well as a chain tool if you have Shimano derailleurs .
If you don’t know how to use these tools, it’s worth taking some time to learn before your next ride.
With this basic repair kit, you should be able to handle most common issues that come up while riding. Of course, there are always going to be things that are beyond the scope of a simple repair kit.
But having this with you will help get you home safely in case of an unexpected problem.
Bike Tire Repair Kit near Me
If you’re a cyclist, you know that flat tires are just part of the sport. And while it’s always best to prevent flats in the first place, sometimes they’re just unavoidable. That’s why it’s important to have a good bike tire repair kit on hand.
But where can you find one?
Here at Bike Tire Repair Kit near Me, we’ve got everything you need to fix a flat quickly and easily. We’ve got patch kits, CO2 cartridges, and even mini pumps.
And we’re always happy to help you choose the right product for your needs. So whether you’re looking for a complete kit or just a few items to get you back on the road, we’ve got you covered.
Why is My Bike Tire Flat
If you’ve ever found yourself with a flat bike tire, you know it’s not a fun experience. Whether you’re out on a ride and have to walk your bike back home, or you’re trying to get to work and are now running late, a flat tire can ruin your day. But why do bike tires go flat in the first place?
There are actually a few different reasons why bike tires might go flat. One reason is simply because the tube that holds the air inside the tire has developed a hole in it. This can happen from riding over rough terrain, or even just from normal wear and tear over time.
Another reason for a flat tire could be that the valve stem – which is what you use to pump air into the tire – is damaged or broken. Again, this can happen from riding over rough terrain or from hitting something while you’re riding.
If you find yourself with a flat tire, there are a few things you can do to fix it.
If the hole in the tube is small, you may be able to patch it up with some adhesive tape or patches that are made specifically for repairing bicycle tubes. If the hole is too big or the valve stem is damaged beyond repair, then you’ll need to replace those parts before your tire will hold air again. Fortunately, both of these items are relatively inexpensive and easy to find at your local bike shop or online.
Best Bike Repair Kit
There are a lot of different bike repair kits on the market, but which one is the best? That’s a tough question to answer, as it depends on what you need and what your budget is. However, we’ve done some research and compiled a list of the best bike repair kits available, so you can make an informed decision.
The first thing to consider when choosing a bike repair kit is what type of repairs you’ll need to do. If you only need to fix flat tires, then a basic kit with a hand pump and patch kit will suffice. However, if you want to be able to do more serious repairs like fixing broken chains or spokes, then you’ll need a more comprehensive kit that includes tools like wrenches and hex keys.
Another important consideration is cost. You can find cheap bike repair kits for under $30, but these usually don’t include everything you need for serious repairs. If you have the budget for it, we recommend spending at least $50 on a good quality kit that will last for years.
Finally, make sure to read reviews before purchasing any bike repair kit. This way you can see what other cyclists think about the quality of the products and whether they would recommend them to others.
Best Road Bike Tire Repair Kit
A road bike tire repair kit is an essential item for any cyclist. It can be the difference between getting home safely or having to walk your bike home. Here are a few things to look for when choosing a kit:
1. A good quality patch kit that includes a variety of patches of different sizes.
2. A durable hand pump that can easily inflate your tires.
3. A set of tire levers to help you change a flat tire quickly and easily.
4. A multi-tool to help you with any other adjustments or repairs you may need to make on the go.
5 . A small first aid kit in case of any minor injuries sustained while cycling.
6 .
Conclusion
If you’re a cyclist, you know that flat tires are unfortunately part of the sport. But don’t let a flat tire ruin your ride! Be prepared with this essential gear for fixing a flat bike tire on the road.
All you need is a spare tube, a pump, and some basic tools. With these items, you can fix your tire and be back on the road in no time.